Kindle Direct Publishing (KDP) will allow you to design your own book cover. If you don’t want to do that, you can have them do it for you with Cover Create. Personally, I like using a photo that I’ve acquired as a cover. You can make your own cover in Canva, save as a .pdf and upload but I prefer using Microsoft Word. Here’s the directions:
Find a picture and paste to Word.
Save as a .doc to your desktop, calling it Front Cover
Select the color picker tool to identify a solid back cover that matches something on the front. It looks like an eye dropper. Write down the three numbers that appear so you can duplicate that color in Word.
Now go back to Word. Place a text box over the picture, type in the book title, and your name. Save as a .doc as Front Cover
Format the photo to the textbox by clicking both and then click, under Shape Format – Arrange - Group.
Now you’ll “Save as picture” making it a .jpg. I save this to the Desktop, too, as Front JPG to differentiate between the document (where you can continue to make changes if needed) and the picture, (which is what you will ultimately upload).
Open a new Word.doc and click Shape Format Outline – no fill– More Fill Colors and type in the color numbers your wrote down. Now the back cover will match the colors on the front cover.
Save as a .doc as Back Cover to your desktop.
Insert a text box to the Back Cover and type in the book description.
Format the text box to the page itself by clicking on both and then by clicking under Shape Format – Arrange - Group.
Save as a .doc. You do this in case you have to change something. Occasionally, how the text box is placed may be a little off on KDP, though it looks perfectly fine on the Word doc. That’s because you have to take into consideration the book binding. Dependent on how thick your book is, there will be some wrapping from the front cover to the back which means you might not like the look. The Word doc will be helpful to quickly alter and reupload, if needed.
Now you’ll click “Save as a Picture” making it a .jpeg and save to the Desktop as Back JPEG.
Open another Word doc – this makes the third! Make sure under layout to change via Page Set Up-Layout-Orientation to Landscape
Next to Layout is Margins – Click Custom and change all four to a .4. You want as much space to work as you are going to be combing the front and back covers together to upload.
Copy and paste the Front cover. jpeg. Click text wrap to move it to the right side of the page.
Click Shape Format and look at the far right to Size. Now type in the height and width of the cover to adjust to your book size. I used 8.5 x 11” books so my typed in numbers are .7727=6.18
Now copy and paste the back .jpeg to the page and adjust the size as in the last step. Voila! The two images are now the same side. Click the Wrap to move the back cover next to the front cover. HINT: You can hold down CTRL and use the arrow keys to align it perfectly together. You’ll know you did it correctly when you see no white line between the two. If you see a black line, you somehow have a border around the pages. Simple go to Shape Format-Shape Styles – Shape Outline and click No Outline.
Group both front and back covers by holding the CTRL key and clicking both, then going to Shape Format – Arrange – Group. Now you have one large picture. Click “Save as Picture” as a .jpeg calling it Final Cover to your Desktop.
When you are ready, upload to KDP. HINT: If your name got cut off or the text boxes aren’t centered, you can remove your upload by clicking anywhere on the cover on KDP. A box will appear on the right and you can click “Discard Cover.” It tells you this NO WHERE but after experimenting we figured it out. Then, go back to your .doc for whatever you didn’t like, change it, Save as picture as a .jpeg, ungroup the Final Cover, replace the one you didn’t like, Regroup, Save as picture as Final Cover, and reupload.
Yes, this looks and sounds complex, but after you do one, it will be a breeze. Best part, now your book is ready for publication!
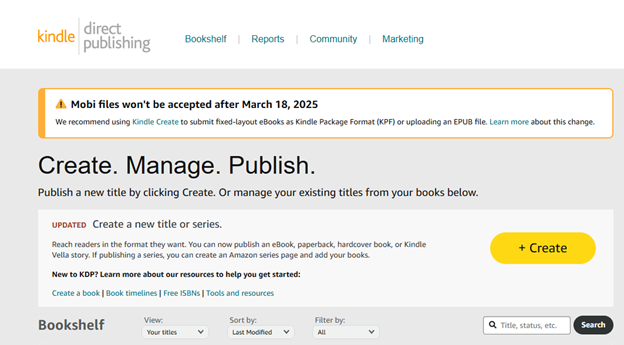
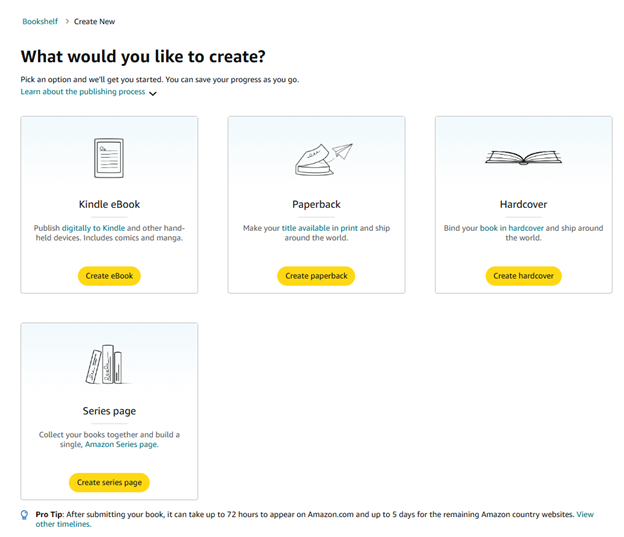
Self-publishing with Kindle Direct Publishing is a breeze. First, create a free account at kdp.amazon.com. Then click the +Create button to get started.
Next, decide on the type of book you want to create. No worries, you can always change your mind later and even publish in more than one type (eBook and Paperback or Paperback and Hard Cover, etc.).
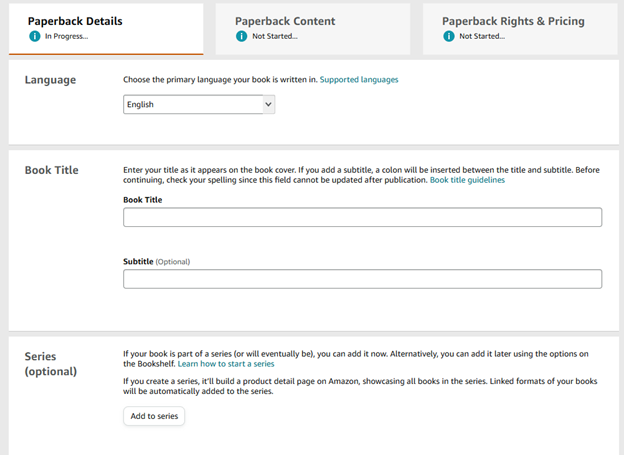
You also have size options! I selected 8 ½ x 11" because I had many colored photos I wanted to share. Next, you’ll have more options to consider:
Choose your language
Type in the book’s title. Don’t have a subtitle? Leave it blank
Not a series? Just skip this section.
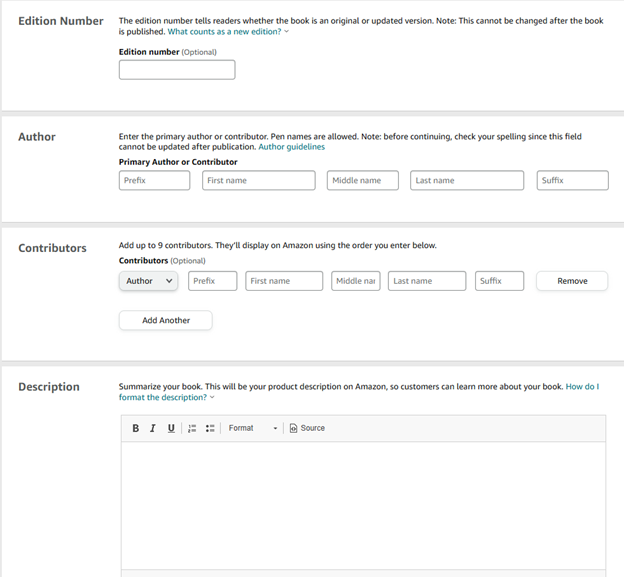
Since this is the first edition, leave the Edition Number blank. One of the benefits of KDP is that if you revise your book, you can easily enter the 2nd (or 3rd, etc.) here so that purchasers are aware of which copy they are buying. This is perfect for when you finally get over that brick wall and can update your story.
Next, type in your name as you’d like it to be shown on the front cover.
If you didn’t work with anyone else on writing the book, leave the contributors blank
The description is important as it will tell buyers a little bit about the contents of your book. You can have your favorite AI proof what you come up with.
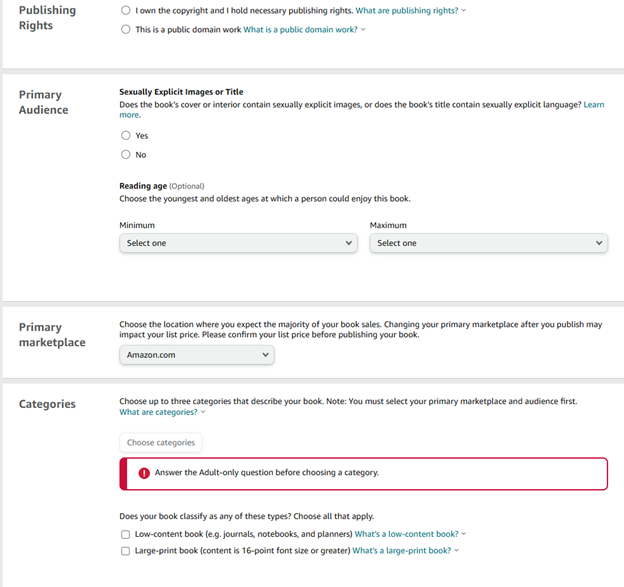
As family historians, copyright is always important, but the beauty here is that if you want to make your work available in the public domain, you have that option. Or, what I did instead, was copyright the book on KDP, but when I donated a copy to the Allen County Public Library, I signed a release that allows them to digitize the books for FREE to everyone. My goal was to get the information out into the hands of distant family who can benefit from it, and not make money from book sales.
You MUST select either Yes or No regarding sexually explicit content. If you select no, you can skip the reading age.
I opted to have my books sold through Amazon, but other options are available.
Categories are very important, and you can pick three with subcategories available. Genealogy is under the history reference.
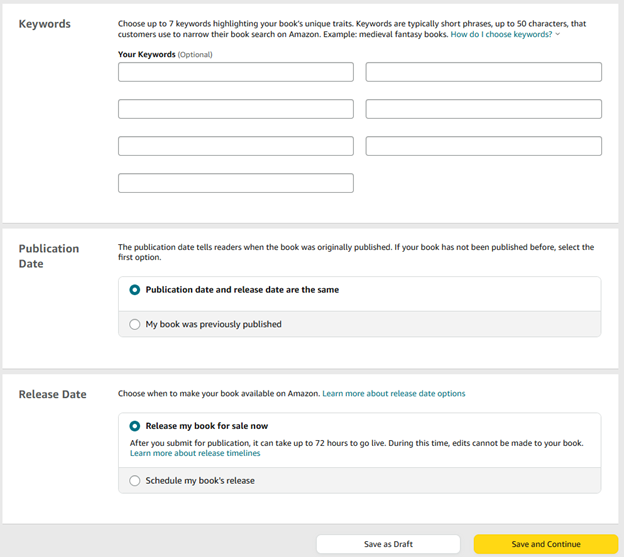
Why select keywords? They help Amazon market your book to the right audience. Think hashtags! You don’t need to come up with 7, but you can if you like.
Since this is your first printing of your book, leave the selection at “Publication date and release date are the same.”
I will release my book for sale as soon as it’s available through KDP, but perhaps you want to wait for a special occasion, like a family reunion.
Click the yellow button, Save and Continue.
The next section is Paperback Content. Here is where you will upload the book cover if you’ve created one and the book contents. You don’t have to do this all at one time, either – once you’ve saved, you can go back to working on your selections any time.
I recommend clicking that you want KDP to assign an ISB number; if you plan on giving copies to libraries, this will be helpful.
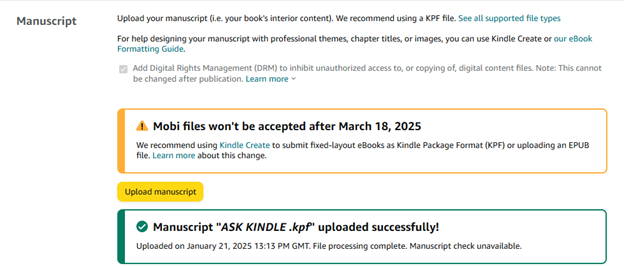
Next, upload your manuscript. It does take a few minutes to process.
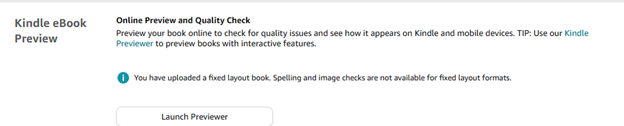
When it’s ready, you will receive a notice that it has uploaded successfully. Go to the bottom of the page to preview your book by clicking Launch Previewer. You will have to open and close your Word document numerous times if you have included a lot of photos and tables. What the Word .doc looks like is NOT how KDP's software publishes it, so you may have to adjust your Word .doc 50 times (seriously) or more to get it to print right on KDP. This is the most tiresome and difficult part of the process, but know you are at the end of the journey,y so hang in there.
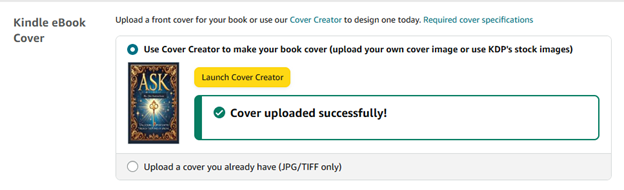
Now it’s time for the cover. See last week's blog for the how-to on creating it. I use a photo I have taken and add a text box to it, format it, and upload it through Launch Cover Creator. I’ve tried the .pdf upload and wasn't happy with the results. If you have no idea what you want for a cover, KDP will give you ideas through Launch Cover Creator.
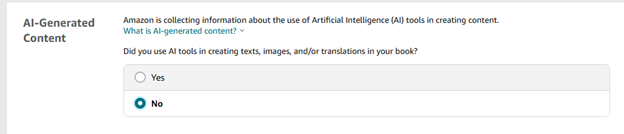
Next, you’ll need to complete a survey about AI usage.
If you used it, click Yes, and you will have three items to complete – what tools did you use and how much of AI (some sections, extensive, etc.) from a drop-down menu; what images and what translations did you had help with.
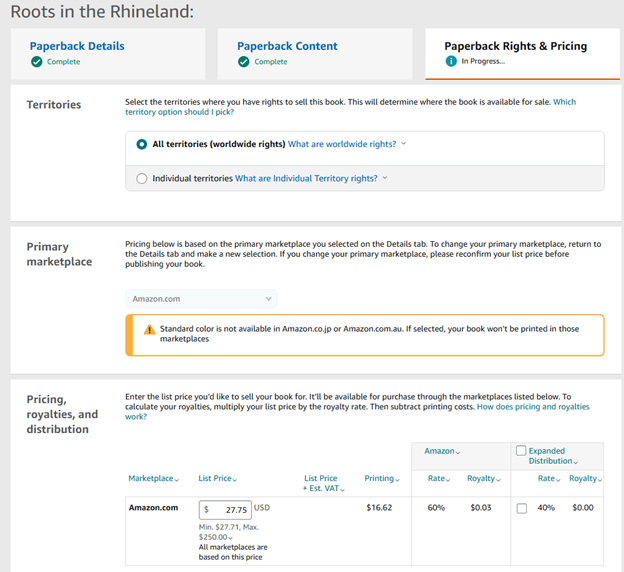
When you are happy that the book is formatted properly, then click “Save and Continue” at the bottom of the page. Next step – Pricing:
KDP will tell you how much it is going to cost for them to print the book(s). You set the price after they give you their minimum. I want the books in the hands of people who share my ancestry, and I don’t want them to pay a fortune, so my royalty, as you can see on my latest book, is 3 cents. Yes, you read that right. I’m making 3 cents on every book sold. If you want to be paid for all the time and effort you put it, then adjust the price, but that’s not why I wrote my books.
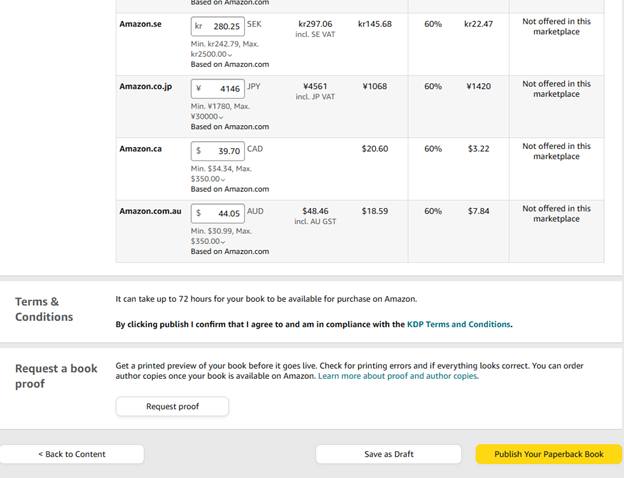
I didn’t include the lengthy page info that follows, but it will show you how much it will cost in all of KDP’s markets using the type of money that is accepted in those areas. So, for Great Britain, it will display the cost in pounds, places in Europe, in euros, etc.
Obviously, you have to agree to the terms and conditions. I haven’t requested a proof book as I wait until KDP has reviewed it and is ready to publish it.
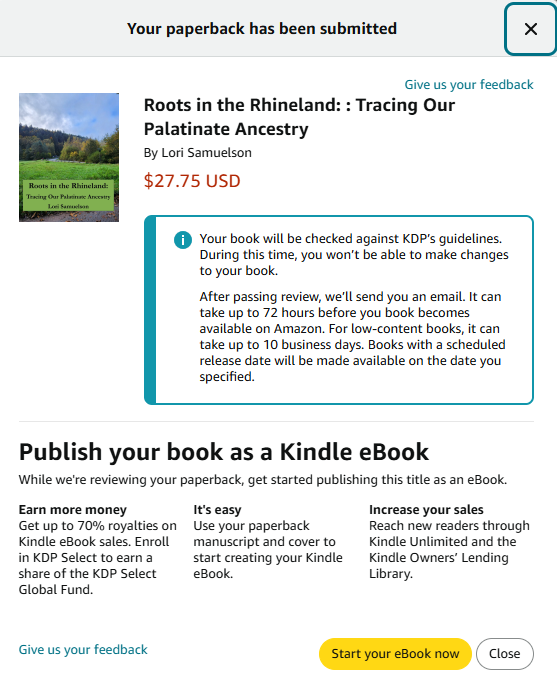
Next, click the yellow box “Publish Your Paperback Book.” KDP will review your book, and within a day, you’ll receive an email that your book is ready to publish.
Then, I request an author’s copy, which is the bare minimum that you can purchase the book for (so it’s less than the .03 cents of my royalty). I typically buy 3 – one for my husband and me, and one for each of our adult kids. I look through it, and if I’m happy with it, no changes needed, I then order copies for local libraries to donate. In the meantime, the book is available to the general public through Amazon. Just go to Amazon.com and type in your book title or your name, and it will be there for you to see. They also allow buyers to see some of the contents, the table of contents, and a chapter or two. If you don't want to sell to the public, take the book off the market.
After KDP reviews the content, you can order Author copies:
That's it! If you sell books through Amazon, you will get an email monthly that tells you what your royalty payment is. The money will be placed into the bank account that you authorized KDP to use. Any changes - edition updates, corrections, from paperback to hardcover, etc., can be easily made after logging back into your account.
What are you waiting for?! Time to get writing that family history you've put off.
Today’s blog post is on how to set up a Word document to write your family history book. After opening Word to a new document, your ribbon and blank page will look like this:
Click on ‘References” on the top line of the Ribbon. You’ll see what it looks like below:
Now, click on Table of Contents. I select the basic style but you have options for whatever you envision. You will get a message that you have no items for the Table of Contents. No, you don’t so that’s fine but you will soon.
You have two options now – you can start writing and add to the Table of Contents as you complete sections or you can set up the entire book outline first. It makes no difference which you choose. For my example, I am setting up Word with nothing written yet.
Next, I’ll click on the ribbon “Insert” and under Header & Footer, click Page Numbers. I want them at the bottom middle of the page. Again, whatever is your preference is fine. The first page of your book begins with the Table of Contents. If you want your first page to begin with the writing itself, you will have to create a page break at the bottom of the page but I’m skipping that for now, setting up the rest of the book.
How do you get items to add to the Table of Contents? Easy.
On the ribbon from the Home option, look in the middle and you’ll see Styles. If you click on the down arrow on the right you’ll see so many more choices:
I stick with the three Heading options. The largest Heading I use for Chapter titles, Heading 2 is for my Pedigree Charts, and the biographies are Heading 3. When I begin writing the page will change from this:
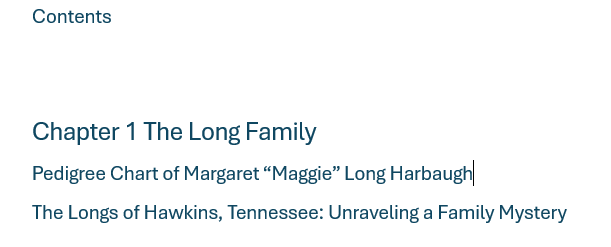
To this:
Why is the info I just typed not showing under Contents? Because I need to update the Table of Contents as I add to it. To do that, simply go back to References on the Header and click under the Table of Contents section – Update Table. It will display the following:
My personal preference is to use Times New Roman, size 12 font for the writing. The default for the heading styles is Aptos (Body). You can change it to whatever you want, but I tend to leave it so that it stands out differently from the rest of the page. I also make sure, under Style, that I have clicked “No Space” when writing the bios, as I want to conserve space as I write. Remember, your book will cost by how many pages and other selections that you have made (hardcover vs. paperback vs. eBook and color photos or not). I’d rather splurge on the color photos I’m including than on the page length.
I like to include a Title Page and it’s tricky to get it added. Here’s a workaround for that.
On the ribbon, under Insert, click Cover Page. I pick Sideline because there is limited color and text there. Don’t worry – you will delete the words and lines that are on this page easily by just clicking and hitting delete. I then have a front page with NO PAGE NUMBER. I will use Garamond font for the information. Click Insert on the ribbon and select a Text Box – anyone will do.
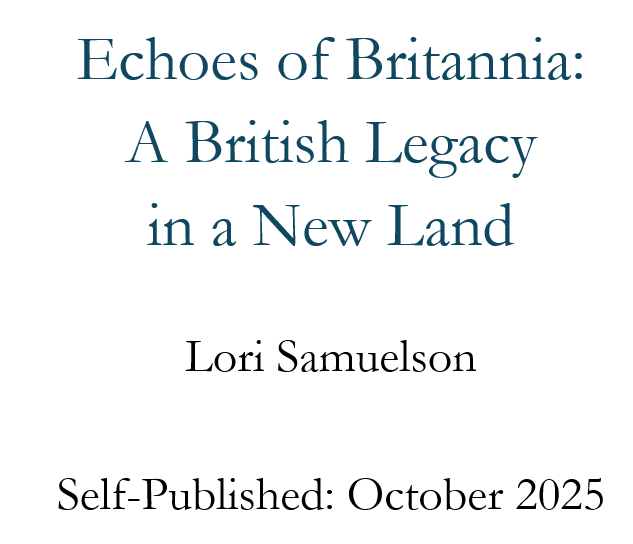
Now, click in the box and delete the words. Go to the edge of the box and make the box larger so that you can type your book title, your name, and Self-Published: (date). I use 48 size for the title and 36 for the subtitle, my name, and publication info. Next, I click on the box outline because I want a clean page, but you can leave it if you like it. When I right-click on the line, I get the option of Fill and Outline at the bottom. I select Outline and click No Outline. My title page now looks like this:
As you write, you will want to use endnotes or footnotes. Although I’d prefer a clean page and have the sources in the back, I had difficulty getting the page numbers to accommodate that, so I went with footnotes. To add a footnote, simply go to References – Insert Footnote. Word automatically will keep the numbers in order, and your cursor will move down to the bottom of the page where you’ll include your source.
After my book is written, I then add the photos, clips of documents, or graphics that I think will make it more appealing to my readers. All of my photos are digitized, so I don’t have to scan them in, but you may have to do that with some of yours.
When I find a photo I like, I simply right-click and copy. Then, I place it where I want to put it on a page by clicking Ctrl + V to paste:
Photo 1 New Providence Presbyterian Church, Stony Point, Tennessee
Next, I’ll click on the picture and select Insert Caption. I’ll type in the box what the picture is about. Mine defaults to Figure 1, but I can easily change it to Photo by simply typing that in and deleting "Figure." You may want to move the photo elsewhere on the page or change the size. Just left-click on the photo and click the box with the upside-down U that appears. I tend to click the middle option on the top – the upside-down U, as it lets the text wrap around the photo.
When I’m done writing my book, I’ll want to include an index. There are several ways to compile one, and they are all a pain in the neck. I have tried using the Word feature, but was not happy with it because it is difficult to read the text for last-minute edits and changes the page numbers. For my last two books, I did it the old-fashioned way – created an index by reading through my book and typing the Subject and Page Number in a second document. I do have three screens on my computer, which makes this doable. If you have only one, you can minimize the two pages so they share the screen. My preference is to make the page numbers in bold, but again, it’s your book and your choices.
After I compiled the index, I typed “Index” using the largest Heading under style and made sure that I went back to References to Update the Table of Contents.
On the document where I created the Index, I clicked on Layout and selected Columns – 2. That saves more space.
On the very end of the last page of my book, from the Insert tab on the ribbon, I click Page Break. The reason is that I don’t want the Index that I’m going to copy and paste into the book to format the rest of the book into two columns. After you’ve added the page break, go to the next page and copy (Ctrl + C) and paste (Ctrl + V) the Index from where you compiled it to your book.
Sometimes, but not always, I run into a problem where the page numbers begin with 1 again. Here’s the quick fix if that happens to you. Go to Insert – Page Numbers – Format Page Numbers and click the box that says to continue from the previous section.
I have the free version of Grammarly installed on Word so it highlights in red issues that need to be addressed – like a comma needed where I didn’t put it. Definitely check out your punctuation and spelling before uploading your finished product for printing.
Next week I’ll be providing you the directions on how to use Kindle Direct Publishing for printing your book. There are many other options available but I went with Kindle for several reasons – the cost was low, I’d had previous experience with it, and Amazon does the marketing.
Instead of having a beach read this Memorial Day, take your laptop and get started on writing your family history!
I discovered a quick and easy way to create a family history book that you need to try! Seriously, in 3 weeks, you can have a delightful book to share with family who isn't as passionate about ancestors as you are.
First thing is to throw out of your head that you can't do it. You can! You have researched for years and probably have all the info that you need. If not, it will become apparent but there's a work around for that.
Second - throw out of your head that you aren't a good writer. You don't need to be! I'm serious! You'll see why in a second.
Third - think about the state of the world and your place in it. Really! You aren't getting younger. Who will want your genealogy research? Will they be able to decipher your notes? Probably not unless you have kept everything completely organized since you began.
Fourth - throw out of your head that you don't have enough knowledge to create a genealogy book. You do! You don't need to write a book the length of War and Peace. You don't have to number your genealogy; in fact, it's probably better if you don't.
Fifth - Don't worry about the cost, as you can do this for very little money.
Now that we've got those barriers out of the way, this is what I did to create a beautiful book for my family in 3 weeks...
Go to wherever you keep your genealogy records and pull out the most far-flung family member in the line you are interested in. I know you're thinking, huh? Why would I do that? Because we're throwing out the rules of genealogy here to get this task done. You, hopefully, researched to your ancestor. If you did that than you know that you've proven the relationships and identities of all those between you and that far out there ancestor. You are starting with the farthest away because you will have less to write about. This is just to get you going. When you've got the first one done you go on to the descendant of which is in your line.
Next, bring up Word (see my blog on how to get rid of that annoying Copilot message). On the top line write the names of the couple you are writing about. In my example, that's Hemming Jonsson and Margareta. It's okay if you don't know a last name or their parents names.
Look at your research and write the following (or copy and paste in you Word file):
[Insert Ancestor Name] was born [insert date] in [insert place] to [insert parents].1 He married [insert wife's name] on [insert date] at [insert place].2 She was born on [insert birth date] on [insert date] at [insert place] to [insert parents' names].3
The couple lived in [insert place] where they had the following children [insert name], (b. [insert date or year], {etc. - add all that you know.}4
[Insert one of the couple's names] died on [insert date] at [insert place.]5 [Insert other one of the couple's names] died on [insert date] at [insert place.]6 They are buried in [insert cemetery name, location].
Here's what mine looks like for Hemming Jonsson and Margareta Larsdotter:
Hemming Jonsson was born about 1655, likely in Östergötland, Sweden; his parents are unknown.[i] He married Margareta Larsdotter about 1684.[ii] She was born about 1650 at Vreta Kloster, Östergötland, Sweden; her parents are unknown.[iii]
The couple lived in Ljung, Östergötland, where they had one known child, Jon Hemmingsson (b. 1685) in Ljung.[iv]
Hemming died on 30 January 1731 at Saby, Ljung, Ostergotland.[v] Margareta died on 7 February 1731 in Saby.[vi]
[i] Sweden, Church Records, 1451-1943, Hemming Jonsson, 30 January 1731, digital image; Ancestry.com: accessed 18 January 2025, citing Ostergotland Parish, Ljung, C:1 (1694-1720), image 208, p. 313. DOB c. 1655.
[ii] Sweden, Church Records, 1451-1943, Margareta Larsdotter, 7 February 1731, digital image; Ancestry.com: accessed 18 January 2025, citing Ostergotland Parish, Ljung, C:1 (1694-1720), image 208, p. 313.
[iii] Sweden, Household Clerical Surveys, 1654-1901, Jon Hemmingsson, 1751-1760, digital image; Ancestry.com: accessed 18 January 2025, image 210 of 306. Age 66.
Death Record for John Hemmingsson, 8 June 1766, digital, image; Arkivedigital.com: accessed 10 June 2024, Vreta Kloster EF:1 (1746-1775), image 134, p. 263. DOB 1685
[v] Sweden, Church Records, Hemming Jonsson, 30 January 173, p. 313. DOB c. 1655.
[vi] Sweden, Church Records, Margareta Larsdotter, 7 February 1731, p. 313.
NOTE: Definitely use footnotes. Why? Because your family doesn't care about the sources, but maybe someday someone will, so they will be there for future researchers. Don't you hate finding an old family genealogy with no info on where they found the dates? Don't be that person! My blog converted the numbers to letters, as in endnotes, but for my books, I use numbers.
Notice some of the info is incomplete - I don't know the parents' names or when the couple married. That's okay. Further research is always available, but if you are so far back, the probability of you finding more records does diminish. In the area where the Jonssons lived, they go back in some parishes to 1555, so maybe I'll find their parents' names someday. Don't let that stop you from writing this now.
4. Yes, the article is terribly dull, so boring that your family will cringe. That's just the info that you need to get going. Now, don't tell me you can't jazz this up to make it entertaining because you will take that info and copy it into your favorite AI. I used ChatGPT. Here was my prompt: Please keep dates in military style and make this more engaging.
Here is what it turned that piece into:
Hemming Jonsson was born around 1655, likely in Östergötland, Sweden. Details about his parents remain a mystery. Around 1684, he married Margareta Larsdotter, who was born circa 1650 in Vreta Kloster, Östergötland. Like Hemming, her parentage is also unknown.
The couple made their home in Ljung, Östergötland, where they welcomed their only known child, Jon Hemmingsson, born in 1685.
Hemming lived to the remarkable age of 76, passing away on 30 January 1731 at Säby, Ljung, Östergötland. Margareta followed him in death just days later, on 7 February 1731, also at Säby.
Their lives, though largely enigmatic, are rooted in the rich history of 17th-century Sweden. Hemming and Margareta's brief legacy echoes in their son Jon, a solitary thread in the tapestry of Östergötland's past.
Your family will be interested in that! It took me about 10 minutes from start to finish. I did not show you the footnotes on the revised article to save space. All you'll need to do is copy and paste the article back into Word and realign the footnotes. You will probably make some adjustments. Take out what you know isn't a fact, AI likes to write about someone being born on a hot summer day. It didn't know if it was hot! Add anything you'd like, perhaps I could end with, "The lives of our farthest flung ancestors," or if you are writing for a particular generation, like your grandchildren, "The couple were your 7th generation grandparents."
The beauty of this is that if you are writing place names that use diacritical marks, you don't even need to add them; ChatGPT will do that for you.
I've added photos I took of some of the ancestors' homes, churches, and work sites. A local enthusiast told me it makes it a graphic novel - hey, why not? For those who don't like to read, the pics will make the story more entertaining.
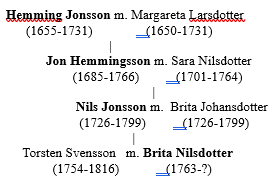
5. I include a short pedigree chart at the bottom of the article, highlighting the line that will be followed. Sure, you could number, but that confused my family, so I went with the graphic. Here's the chart I'd include for Hemming Jonsson:
I include 4 generations so the reader can see where they are going and what they'll read next. I like foreshadowing. It is also nice to go from the 1600s to the 1800s in just four simple steps. Highlight the individuals that will be traced in the lineage. When I get to Nils Jonsson, I'll delete Hemming and Margareta and add the children of Torsten and Brita.
If you know the names of other children, include them on the chart under their parents. I also include married names for females. I'm not going to be writing about all of the family in depth, just the ones that are of direct lineage. Why? Because I don't have time for that, and my family doesn't care. I have the info in my tree if it was needed, as sometimes we must pull from a sibling or other relative in the sketch - like grandma lived with Uncle Jake in 1880, so you'll source that census. It's important to research thoroughly, but you don't have to provide every piece of info on other relatives unless it's pertinent.
When you're done, make a Table of Contents, add a page number, and an index. Write a page about yourself and why you took on this project. Include a title page.
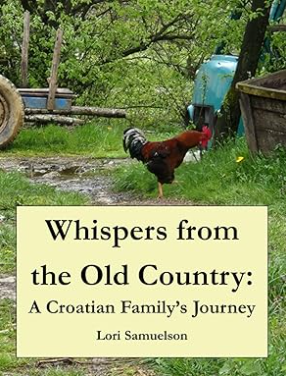
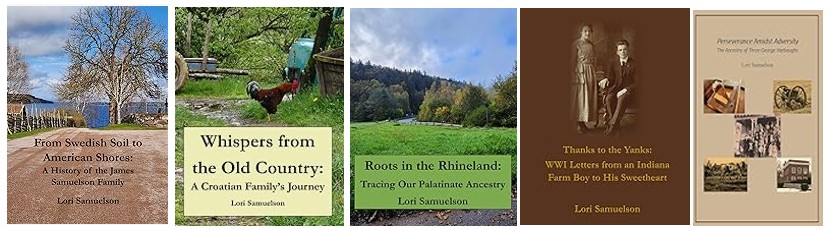
Below are links to books I published last winter so you can preview them to get an idea of what you'd like in yours. Each is different. From my travels to Sweden, I had lots of info and pictures of the homes, churches, and work sites of my husband's ancestors, but for my Croatian family, since they lived in the same location for centuries, there were only so many pictures I could include. That gave me space to add family stories that I investigated and recipes that were family favorites. My German book includes French, Swiss, and Dutch ancestors, too, since I decided to place all those who emigrated for religious reasons in one volume. I'm working on our British ancestors, my last book, but won't finish it until next winter. Do you have a collection of family letters? Then by all means, digitize, transcribe, and then have it printed.
Next week, I'll be blogging about how to set up Word so you can upload the book to get it published. The following week, I'll blog about some options you have in publishing and what I chose.
Then, pat yourself on the back because you did it! You are now an author, historian, and an awesome person who got your research out there. Good for you!